Tamper-Evident Flip-Top Cap Mould
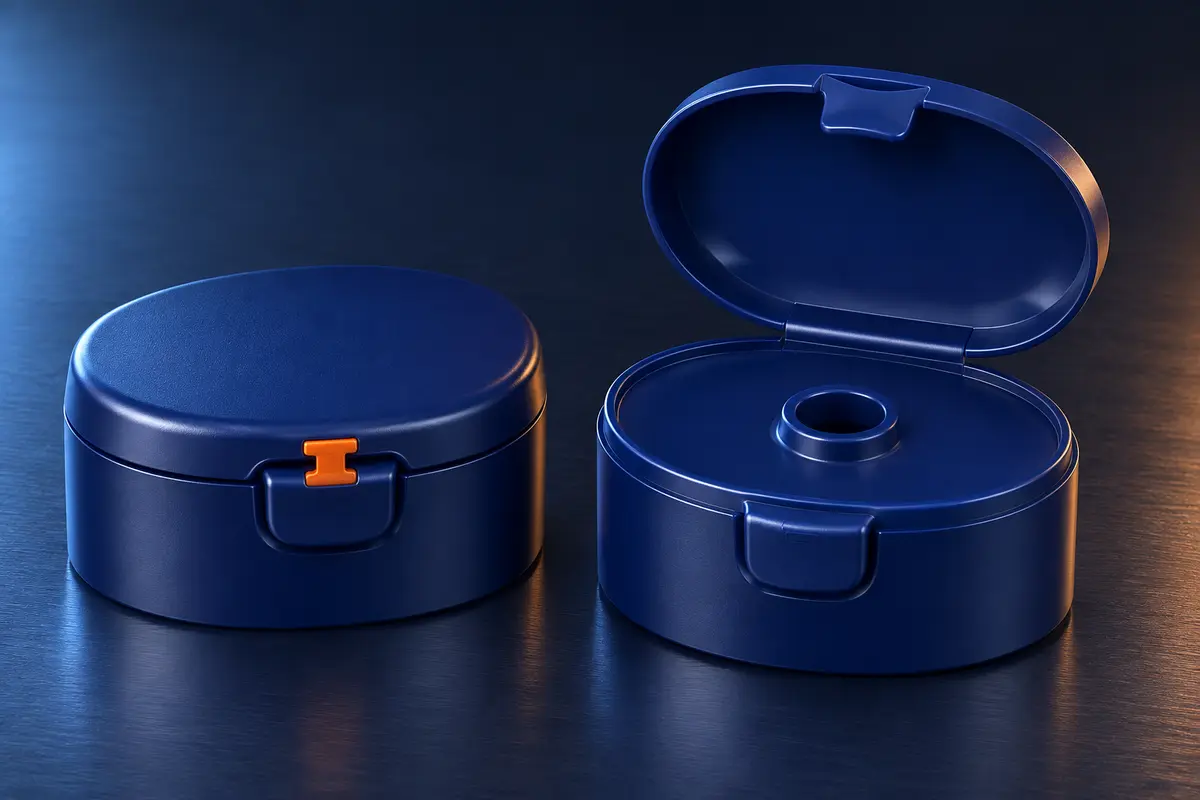
Mincong designs custom injection moulds for snap-on flip-top closures with a first-opening indicator at the lid. In a one-piece design, the lid and cap body are moulded together and connected by a living hinge. The front latch can hold the lid shut before use, while a dedicated feature at the latch shows that it has been opened.
If you are replacing an existing closure, send a matched bottle and cap. An unopened sample and a sample after first opening show us what the indicator should look like before and after use.
Tooling Scope for a Snap-On Flip-Top Closure
| Design detail | What we review before machining |
|---|---|
| Snap-on body | The actual bottle-neck profile, retaining bead and sealing surfaces. We also check how the cap will be pressed onto the bottle. |
| One-piece lid and hinge | The open part geometry, hinge area, gate position and release sequence. The lid and body are formed in one shot for this construction. |
| Front latch and first-opening indicator | Where the latch engages and how the indicator changes on first opening. We review whether any moulded undercut needs a separate release movement. |
| Dispensing seal | The sealing interface around the opening. If the design uses a separate silicone component, its seating geometry is reviewed with the supplied component drawing or sample. |
| Closing and handling | Whether the cap needs to leave the mould closed or can go to a separate closing station. The route depends on the lid geometry, press and downstream equipment. |
A nominal neck size alone is insufficient for a snap-on closure. Two bottle necks with similar diameters can have different bead profiles or seating heights. Send the dimensioned neck drawing or an actual bottle before the cap-to-neck interface is released for tooling.
What to Check on Trial Samples
Approve the cap on the intended bottle using the agreed assembly method. Check that the body seats and stays in place, and that assembly and closing leave the first-opening indicator intact. Open the cap once and confirm that the indicator changes visibly in the intended way. Then reclose the lid and verify the required closing feel and sealing performance.
A lid that clicks shut can still leak. Agree on separate acceptance criteria for the seal and for the first-opening feature. For a multi-cavity tool, keep samples identifiable by cavity so any difference in latch behaviour or fit can be traced back to the tool.
Read our guide to cap fit and sealing
What to Send for a Quote
- Cap CAD or a sample, preferably both before and after first opening.
- Bottle-neck drawing and a matching bottle.
- Resin grade, intended assembly method and any separate seal component.
- Injection machine model, output target and preferred closing route.
- Acceptance criteria for first opening, reclosure and sealing, if available.
Discuss Your Flip-Top Cap Project